What transforms a website into an online store? Products, of course. Whether you’re new to Shopify or looking to improve your skills and save time, you need to master adding products to Shopify. Read this guide to learn how to add your first product and perform a bulk upload with a spreadsheet or app.
Step-by-step guide: How to add a product to Shopify
Creating your first Shopify product is exciting— it’s when you can truly visualize how your online store will look. Follow these instructions to add your first product to Shopify, or watch the video below to see the steps visually.

Pros of a manual upload: Adding products individually gives you meticulous control of each product detail including price, description, and other options.
Cons of a manual upload: It’s very time-consuming for multiple products.
Manual product upload instructions
- Log into Shopify and open a new product. Under the menu on the left-hand side, select ‘Products’ then ‘Add Product’.
- Add your product details. Here, you can add information about the product, including:
- A product title and description (View our product optimization guide for tips!).
- Images and videos in the media section. Once you’ve saved the product, you can go back and add alt text for SEO purposes.
- Pricing with options for charging tax, including a ‘compare at’ price and a cost-per-item which is not visible to the customer.
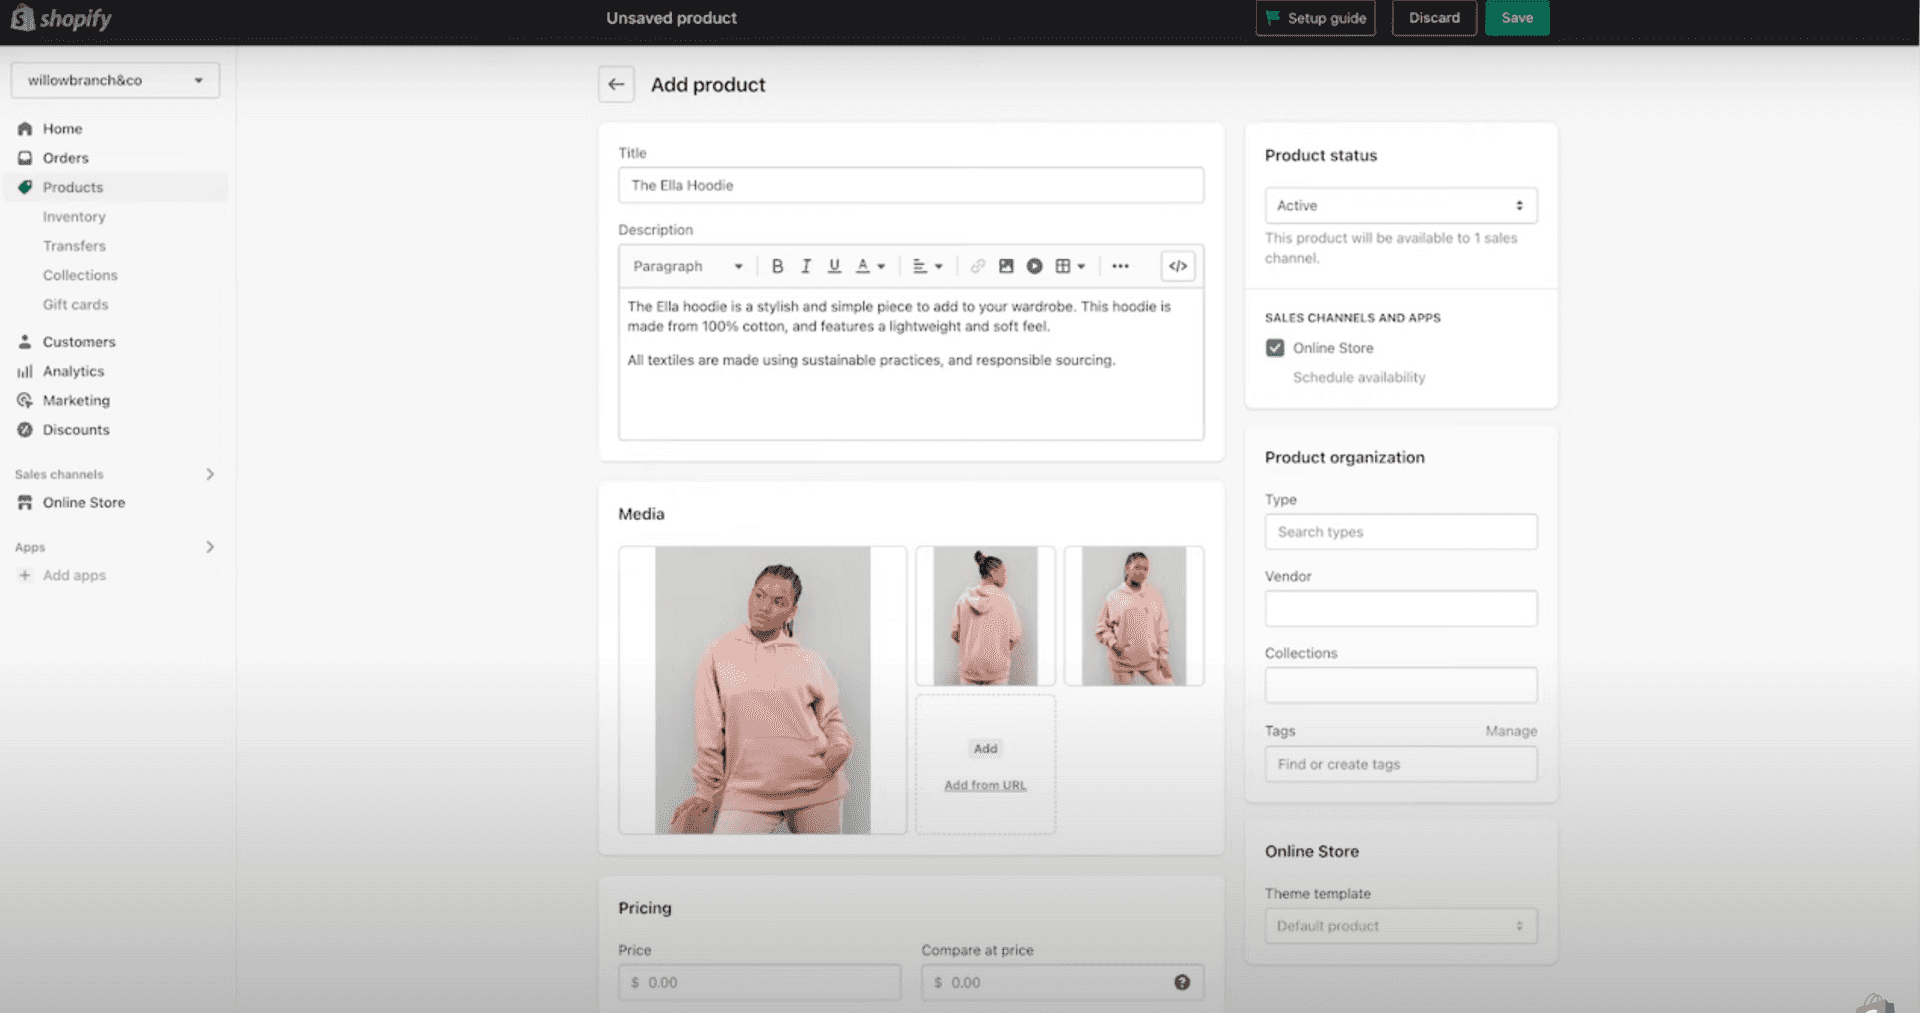
- Add inventory. In the ‘Inventory’ section, add the SKU and/or barcode numbers. You also have the option to track quantity and specify if you want to continue selling once you have sold out or not. Use the dropdown to specify the number of items available for each location.
- Edit shipping options. If you are shipping your products, select the checkbox next to ‘This is a physical product’ under ‘Shipping,’ then add the weight of the product and any customs information.
- Add variants. If your product has different options (such as size or color), you will need product variants. Select the checkbox in the ‘Options’ section, add each option, then click ‘Done’. You’ll then be prompted to add the quantity for each variant.
- Select sales channels. Choose where you want the product to display by selecting ‘Manage’ next to Sales Channels and Apps. Select the options you want, then click ‘Save’.
- Save as draft. To make your product available but not public yet, select ‘Save as draft’ at the top right of this page. Once you’ve previewed the product and are ready to publish it, you can find the item on your ‘Products’ page and change the status from ‘Draft’ to ‘Active’.

How do I import products to Shopify with a spreadsheet?
One way to save time building your store is to import products to Shopify with a spreadsheet. If you’ve exported products from AliExpress or WooCommerce, you likely already have many of the product details you need in a CSV file.
Pros of a CSV import in Shopify: Time savings and the ability to find/replace text fields or data.
Cons of a CSV import in Shopify: In Shopify’s importer, you need to format your spreadsheet to Shopify’s exact formatting. Any error as small as changing the order of the headings could cause the upload to fail without explanation or create duplicate products.
Because of these issues, we recommend using a third-party app like Ablestar Bulk Product Editor to manage a bulk upload. If you want to try Shopify’s native CSV importer, you can watch the video below or follow the steps.

Shopify CSV import instructions
- Download a sample CSV file.
- Format your product spreadsheet to the exact headers and formatting listed here.
- Adding a row for each product variant. Enter variant details, but leave the title, body HTML, vendor, and tags column blank.
- Upload your product images to Shopify or another hosting service and obtain the URLs. Then, add the URLs to the correlating rows in your spreadsheet.
- Under Shopify Admin, go to ‘Products’.
- Click ‘Import Products’ and select the CSV file from your computer.
- Select whether you want the new products to override any previous products and whether you want them to publish to all sales channels.
- Carefully preview each product, then click ‘Import Products’.
What’s the best way to do a Shopify bulk upload?
Because of the slow nature of manual uploads and the issues with Shopify’s native CSV importer, we recommend using the Ablestar Bulk Product Editor to manage a bulk upload. If you’re migrating from WooCommerce, you can also use the WooCommerce Importer to easily move your products over.
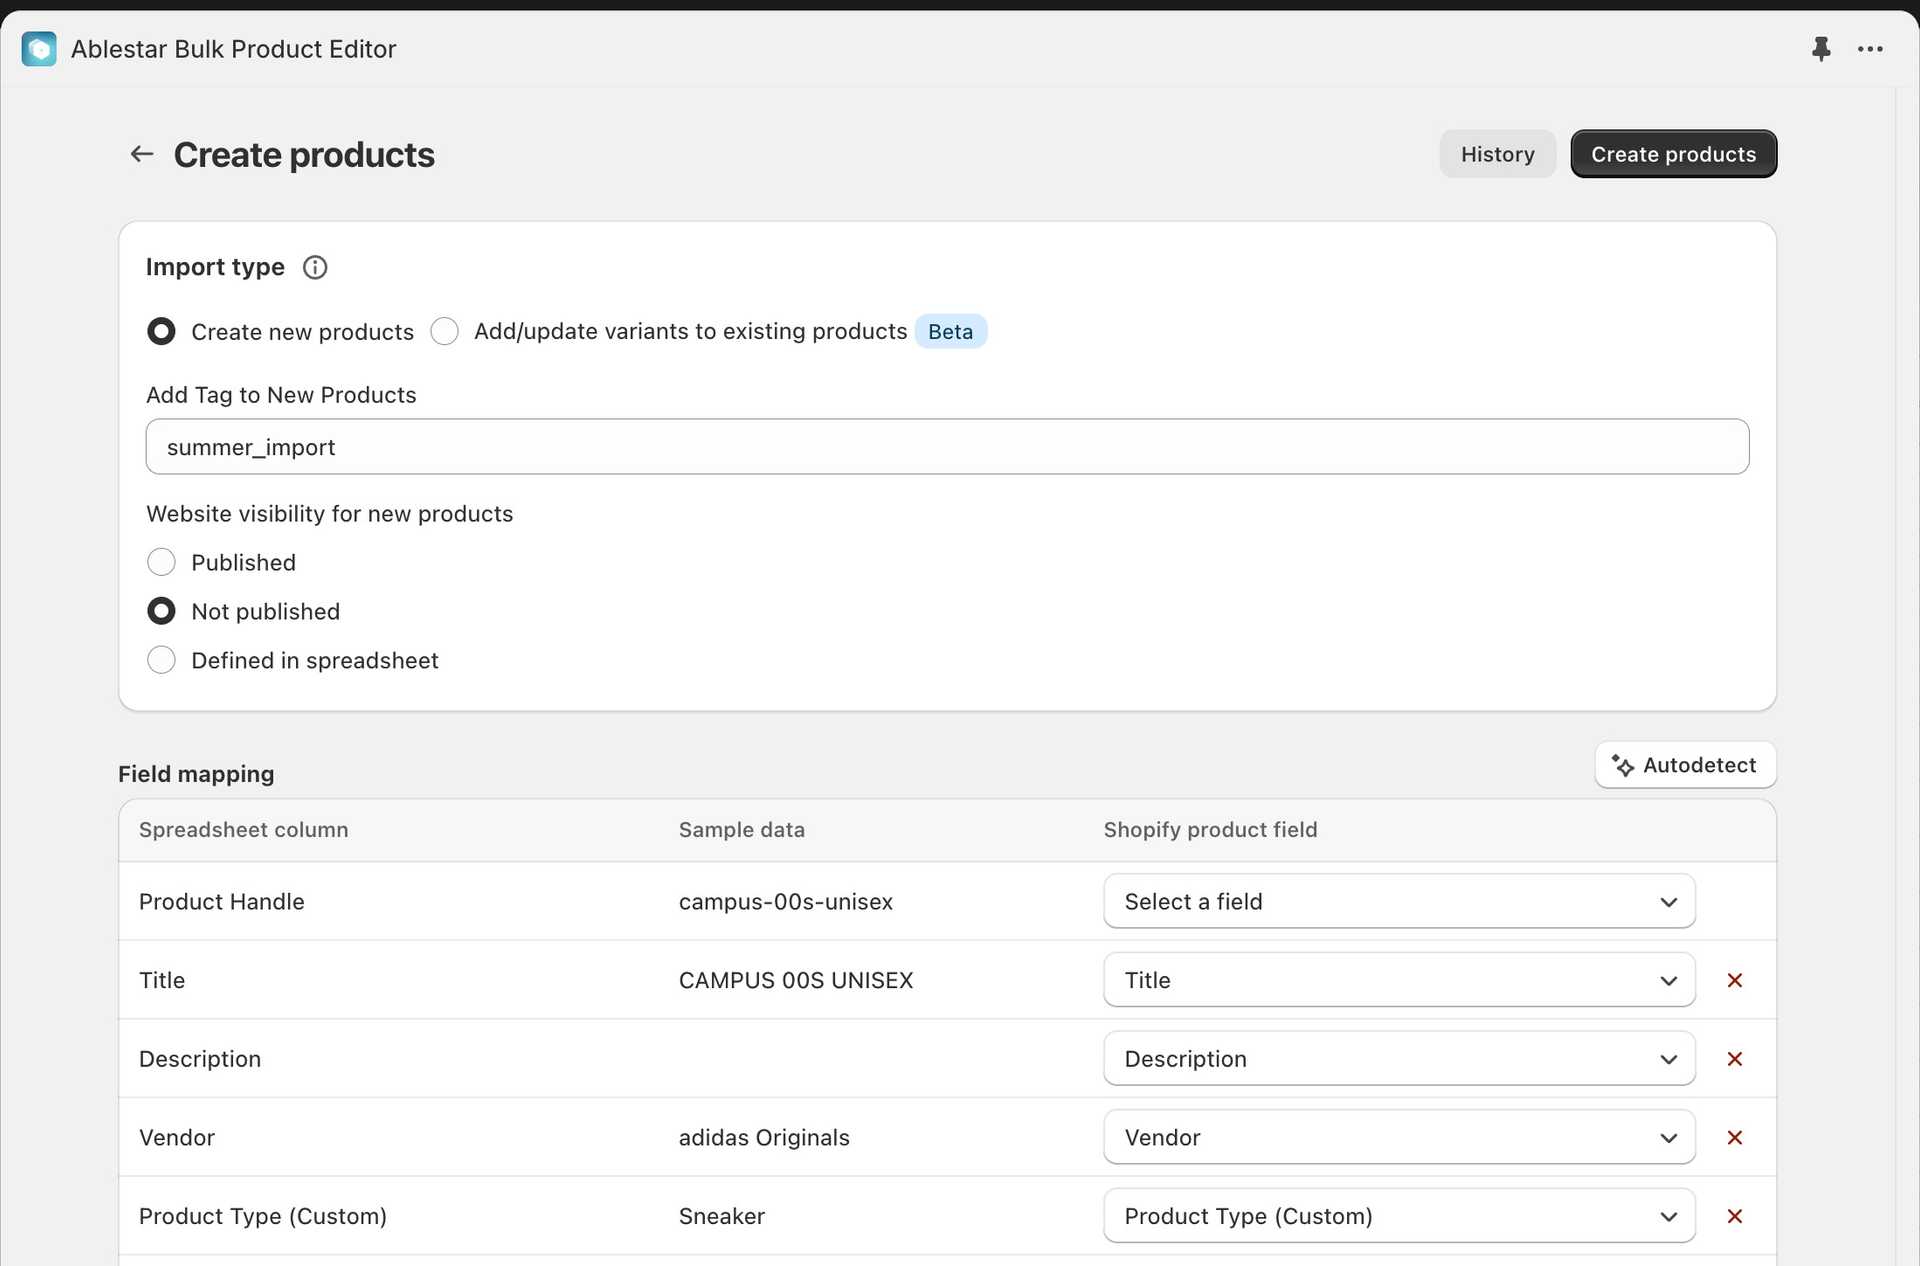
Unlike Shopify’s version, Bulk Product Editor’s CSV importer has more flexible formatting and lets you map your spreadsheet columns during the importing process. This lets you take a spreadsheet you exported from another platform and upload it without meticulous re-formatting. Plus, you can bulk edit products in the app once you’re done.
Shopify CSV import instructions with Bulk Product Editor
- Install the Bulk Product Editor and connect it to your Shopify store. There is a free starter plan if you want to try it out first.
- Create your CSV file using our sample CSV template or spreadsheet you already have (accepted formats include Excel and CSV). At a minimum, you need columns for product title and price. You can name the columns whatever you want.
- For variants, add a new row with the option name and values.
- If adding images, you should already have the images uploaded to Shopify or Dropbox and add the image URLs to your spreadsheet.
- In the Bulk Product Editor app, click ‘Create Products’ in the left-hand navigation.
- Select ‘Click to Upload Spreadsheet’.
- Follow the prompts to map the spreadsheet columns to Shopify fields. Use ‘Autodetect’ and manually map any that don’t match up.
- Select ‘Import Products’ and watch the status of the import.
- To make any further changes or schedule products to publish, search for the products by name or find them in your recent import history.
While you may want to add your first few products manually to understand all of the product fields, it won’t be long before you’re growing your store and adding products in bulk. Once you’re in growth mode, you can save time by bulk-uploading products. You can also take advantage of bulk editing capabilities to run a storewide sale, optimize your products, or make any other changes needed.
Get your store up and running faster with Ablestar Bulk Product Editor for Shopify. Try it today!
